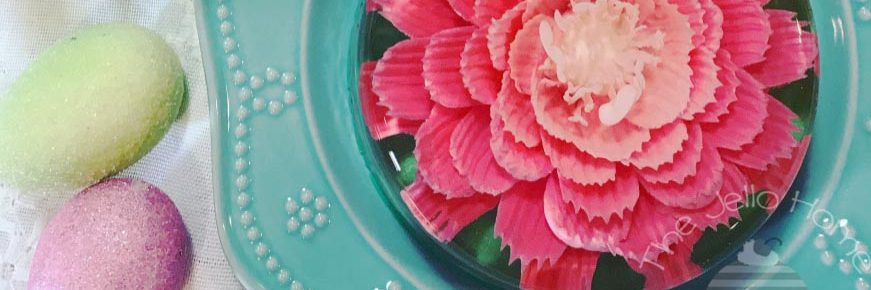
My daughter’s Jr. High teacher assigned the class to make a a color wheel. It could as simple as a crayon coloring or as intricate as they wanted to make it. The teacher even said they could make it edible. So of course, my daughter decided to make a color wheel from gelatin with 12 different colored flowers all made with different tips.
First, she made a clear gelatin base in a vintage jello ring Tupperware mold. Click here for the recipe for a great tasting clear gelatin base. Or scroll to the bottom for both recipes used in this project.


Second she made the colored gelatin with the three primary colors and a white base. Click here for the colored gelatin recipe or scroll to the bottom.

We put the colored gelatin in cups in a large saucepan of warm water on low heat on the stove. This keeps the gelatin at a liquid state giving her time to create the intricate designs and flowers. We also put a cup with just water in it in the warm water. We use this to clean out the syringes and needles so that the gelatin doesn’t dry and clog the needles.

Before beginning the flowers, she marked 12 places around the gelatin for each flower and carved out a little of the gelatin at each spot. This helped her make sure each flower was evenly spaced. Carving out the gelatin helps keep the excess gelatin from running all over the top of the clear gelatin and makes a center for the flowers.

For her assignment, she had to include the primary colors, secondary colors, and the tertiary colors. She used liquid food coloring to make the primary colors and then mixed the three colors to get the desired secondary and tertiary colors. She also wanted to play around with different tips for the jello flowers and used a different tip for each color.

The result was a stunning rainbow of colors in a beautiful clear gelatin. It turned out fabulous and it was made by a 12 year old!


She took it to school and got an A for a great project with top marks for creativity and uniqueness.

Her teacher kept the jello in the foods fridge throughout the day and she picked it up after school. She shared it with her friends at the school play practice and it disappeared quickly. The plate still showed remnants of the fun color wheel when she got home.

Want to make your own color wheel jello? It’s pretty easy. First make the recipe for clear gelatin in a ring mold or bowl of your choice. Then make the Colored Base Gelatin to make the colored flowers.
You can use a clean sterile syringe and straight needle or you can check out some of these beginner tools on Amazon to get you started:
*Yes, I have an Amazon Influencer’s account and make a tiny commission off of your purchase. Honestly, it’s not much, last month (December 2020, I made about $20.00.) I greatly appreciate your add clicks and purchases, they help to offset the cost of running a private blog.

Clear Gelatin
Equipment
- medium saucepan
- medicine dropper
- bowl
- small whisk
Ingredients
- 3 Tbsp clear gelatin powder
- 2 C sugar
- 4 C water
- 1 tsp citric acid powder
- 3 drops clear food flavoring
Instructions
- Mix gelatin with 1 cup of the cold water in a small bowl and let it sit for 10 minutes. In a saucepan, heat sugar with citric acid powder and remaining 3 cups of water. Stir until the sugar is dissolved. Remove from heat when vapor begins to appear above the surface. Do not let it come to a boil. Take off heat.Add gelatin to saucepan and stir until completely dissolved. Using a medicine dropper, stir in just 3 drops of food flavoring. Go ahead and taste it to make sure flavor is right. Pour into desired containers and leave in the refridgerator until set.

Colored Base for Gelatin Flowers
Equipment
- Syringes
- Needles or Flower Tips
- Pan on the stove with a warm water bath to keep gelatin from setting up
Ingredients
- 1 Tbsp gelatin powder
- 3 Tbsp cold water
- 1 Cup heavy whipping cream
- 1/2 Cup sugar
- 1 drop food flavoring
- 3/4 Tbsp white food coloring
Instructions
- First, make the clear gelatin recipe and make sure it is set before you begin creating the colored gelatin for the flowers.
- Mix gelatin with cold water and let stand for 5 minutes.
- Heat sugar with 1/2 Cup of cream in a sauce pan, stirring constantly. Remove from heat when vapor appears above the surface, do not let it boil.
- Add gelatin and stir until completely dissolved, then add the remaining 1/2 Cup of cream.
- Stir in one drop of food flavoring.
- Mix in the white food coloring using an emulsion blender, or a regular blender if you don't have an emulsion blender.
- Put back onto the stove on a very low heat to keep the gelatin warm. Stir occasionally.
- Get the clear gelatin out of the refridgerator. Cut a small circular hole in the middle of the top of the set clear gelatin.
- Pour some of the colored gelatin base into a small bowl or glass. Color it with food coloring.
- Using a syringe and a needle, inject the colored gelatin into the clear gelatin base. Play around with different techniques and designs and colors. It is easier than it looks and fun to create.
- Keep the colored gelatin woarm in the water bath while you are creating with other colors. You don't want the gelatin too hot or too cold. Also having boiling water in a couple other cups in the water bath is good to clean the needles and syringes when needed so they don't get clogged.
- Have fun!
Jello Art Characters
A couple weeks ago, my nephew had a Black Panther Birthday party. When I asked my sister-in-law what I could bring to the party, she quickly replied that she wanted me to bring a jello. AND NOT JUST ANY JELLO…. A BLACK PANTHER JELLO.
What!? How was I going to do that?
I thought about it for a few days and decided to go about it by tracing the character’s outline first and then filling it in. Just like you would with a iced sugar cookie.
It worked perfectly. I used a flower tip to create the necklace on Black Panther and then just used a straight tipped needle and syringe to create the rest.

Follow these links to get the recipes for the Clear Gelatin Base and the Colored Gelatin Base.
With this technique, the POSSIBILITIES ARE ENDLESS.
You can create anything you want.
Black Panther.
Hulk.
Santa.
Elsa.
Rainbow Bright.
Whatever your fandom is.
JUST REMEMBER THAT THE JELLO IS MIRROR IMAGE OF WHAT IT WILL LOOK LIKE FINISHED.
I did write my nephew’s name on the jello, but I had to write it backwards.
One of these days I’m going to invest in some alphabet molds that are typically used with fondant. But I know they would be perfect for jello. Then I won’t have to worry about my handwriting on the cakes.
Also, I had to use Knox Brand Gelatin while making this gelatin cake because my nephew’s name is Knox. What’s more fitting than using Knox Brand Gelatin to make his birthday jello cake.
Below are some links to some products on amazon that you could use to create your own jello art characters. (I know it looks funny to have needles and syringes on my website. This is not a medical page, a diabetic page, or a drug addict page. It’s a jello art page and yes, we use needles and syringes to create our art.)

What kind of characters do you think you will try? What kind of characters do you think I should try sometime?
A Year Of Jello Creations
One year ago, I received my first set of Gelatin Flower Tools for Valentine’s Day from my husband. Who would have thought that it was a great gift? I did! It brought me flowers and smiles all year long.
Here is a compilation of all my jello pictures over the last 12 months including the good, the bad, and the ugly Minnie Mouse.
I love seeing how my flower making skill and photography skills have improved in just a year. I found some pictures that never even made it to my instagram feed.
Some of the jellos were made by my kids. They are getting pretty good now too. Belle’s blue flower went onto State for reflections. Just waiting to hear back from the competition now.
Which ones are your favorites? Comment below.


A Special Jello For a Special Day

CTR stands for Choose the Right.

Last Saturday, my daughter decided to be baptized a member of The Church of Jesus Christ of Latter-day Saints. It was a very special day full of family and friends who came to share in the joy of her baptism day.
I made a special jello art cake for her with the CTR shield and 8 flowers.
- 8 because she’s 8 years old.
- Purple flowers because it’s her favorite color.
- White flowers for purity and baptism.

I also made her beautiful dress. She chose the prettiest fabric at the store. She wanted 2 layers for the skirt. The lady at the cutting table thought it was so pretty she asked if I was making a wedding dress. I just love how it turned out.


I also put the CTR crest onto a towel for her to use after she came out of the water.
And yes, I stayed up past midnight the night before making 2 dozen CTR cookies. They went fast and were oh so good. I’m no professional at frosting sugar cookies, but I’m super happy with how these turned out.

I know that there are many people in the world with many different faiths, and many people who don’t believe in religion. I know that not everyone who follows my page my believe as I do. And I know that we can all come together and be friends no matter what our beliefs are.
I would like to share my belief in Jesus Christ. I believe that he lives and loves us and that we are all beloved children of a loving Heavenly Father.
No matter what you believe, I know that we can all make up our minds every day to Choose the Right. Live every day to make the right choices that will bring happiness and joy to you and those around you. It’s not always easy, but you will be blessed in oh so many ways if you do.

Clear Gelatin
Equipment
- medium saucepan
- medicine dropper
- bowl
- small whisk
Ingredients
- 3 Tbsp clear gelatin powder
- 2 C sugar
- 4 C water
- 1 tsp citric acid powder
- 3 drops clear food flavoring
Instructions
- Mix gelatin with 1 cup of the cold water in a small bowl and let it sit for 10 minutes. In a saucepan, heat sugar with citric acid powder and remaining 3 cups of water. Stir until the sugar is dissolved. Remove from heat when vapor begins to appear above the surface. Do not let it come to a boil. Take off heat.Add gelatin to saucepan and stir until completely dissolved. Using a medicine dropper, stir in just 3 drops of food flavoring. Go ahead and taste it to make sure flavor is right. Pour into desired containers and leave in the refridgerator until set.
Colored Base for Gelatin Flowers
Equipment
- Syringes
- Needles or Flower Tips
- Pan on the stove with a warm water bath to keep gelatin from setting up
Ingredients
- 1 Tbsp gelatin powder
- 3 Tbsp cold water
- 1 Cup heavy whipping cream
- 1/2 Cup sugar
- 1 drop food flavoring
- 3/4 Tbsp white food coloring
Instructions
- First, make the clear gelatin recipe and make sure it is set before you begin creating the colored gelatin for the flowers.
- Mix gelatin with cold water and let stand for 5 minutes.
- Heat sugar with 1/2 Cup of cream in a sauce pan, stirring constantly. Remove from heat when vapor appears above the surface, do not let it boil.
- Add gelatin and stir until completely dissolved, then add the remaining 1/2 Cup of cream.
- Stir in one drop of food flavoring.
- Mix in the white food coloring using an emulsion blender, or a regular blender if you don't have an emulsion blender.
- Put back onto the stove on a very low heat to keep the gelatin warm. Stir occasionally.
- Get the clear gelatin out of the refridgerator. Cut a small circular hole in the middle of the top of the set clear gelatin.
- Pour some of the colored gelatin base into a small bowl or glass. Color it with food coloring.
- Using a syringe and a needle, inject the colored gelatin into the clear gelatin base. Play around with different techniques and designs and colors. It is easier than it looks and fun to create.
- Keep the colored gelatin woarm in the water bath while you are creating with other colors. You don't want the gelatin too hot or too cold. Also having boiling water in a couple other cups in the water bath is good to clean the needles and syringes when needed so they don't get clogged.
- Have fun!
Super Bowl Party Football Jello
Want to bring the most epic jello to your next Super Bowl Party? This 3D football jello is a show stopper that your family and friends will rave about.


To start, I made one recipe of clear gelatin base and poured it into a deep 9×13 glass pan. Find the recipe here. I flavored the gelatin with coconut flavoring, it was so good!

After the gelatin is set, I made 1/6th of the recipe for the colored base to make the white laces and the stripes in the field. Find the recipe here.
After I made the laces, I made another recipe of the clear gelatin base , let it cool for a few minutes then poured it on top.

To make the football, I made a chocolate color base. It’s so yummy! Tastes just like chocolate!

Chocolate Color Base
Ingredients
- 1 Tbsp gelatin powder
- 3 Tbsp cold water
- 1 Cup whipping cream
- 4 Tbsp cocoa powder
- 1/2 Cup sugar
- 1 tsp vanilla
Instructions
- Bloom the gelatin by mixing the gelatin and cold water together in a small bowl. Let stand for 5 minutes.
- Add the sugar, cocoa, vanilla, and 1/2 cup whipping cream to a sauce pan. Heat while stirring constantly until just about boiling. Don't let it come to a full boil.
- Add bloomed gelatin to sauce pan and stir until completely dissolved. Add the remaining 1/2 cup whipping cream.
- Strain the mixture to remove any clumps.
- Let it cool slightly before using.

To make the green grass, I used a regular Lime Jell-O package and made it with the speed set instructions. However, I don’t think I would use the speed set again because the gelatin was setting up too quickly. By the time I made all the grass in the clear gelatin, the Jell-O was pretty set up and clumpy so I had to make another batch of it to. have a nice smooth bottom.

Getting the jello out of the pan proved to be a crazy mess. We almost lost it a few times. Thankfully, I was able to get it all out, although not quite as nicely as I would have liked.
I cleaned out the sink and filled it with hot, boiling water. Then dipped the pan in the water for a while until the edges of the jello seamed to be pulling away from the pan.
Unfortunately, the top layer come out but not the bottom layer. Yikes! So I had to put the pan back in the hot water until the bottom layer started to come out too.
Next time, I’ll make sure both layers are ready to come out of the pan.
What’s your favorite dish to bring to your Super Bowl Party?
I’d love to hear from you and see your jello creations.
Thanks! – Danica

2019 Christmas Jello Trifles
Christmas is a time for the best family traditions and lots of great food. The one food that I always make for Christmas Eve is a Jello Trifle. I have been bringing a Jello Trifle to my family Christmas Eve party for at least the past decade. Every year, the trifles get more and more elaborate.
This year I was super excited to add gelatin flowers to the jello trifles. It took a lot of work and they were gone in super fast, but it wouldn’t feel like Christmas Eve without a jello trifle for our family.

I’ll walk you through step by step on how I made these amazing Jellos. I started at night on December 22nd by making the clear gelatin and pouring it into 2 pans of muffin tins and 3 round bowls.
But I made a big mistake. I wanted to triple my regular recipe so I used an older pan. One that I never used before while making jello. Well, the pan left little black flecks of non stick coating all throughout my jello. I picked a few out and thought maybe I had them all. But it kept bugging me all night when I would think about it.

When I woke up in the morning, I went to check on the jellos and I could tell that little black flecks were throughout all of the jello. I didn’t want to eat it and no way was I going to serve it to my family. So I scooped out all of the clear gelatin and threw it away, along with the terrible old pan. Boo!
So back to step one again. I grabbed a newer pan and didn’t it all over. But this put me hours behind where I wanted to be.
Click here for the recipe for the clear gelatin base.

Hours later I finally was able to start the gelatin flowers. First, I scooped out a small hole in the middle of each gelatin. Then I made 24 poinsettias in the 2 muffin pans. One pan of white poinsettias and one pan of red.
Click here for the recipe for how to make the gelatin flowers in the clear gelatin base.


After I made the small poinsettias, I made 3 large poinsettias.

Here comes the tricky part. Getting the small jello flowers to stick to the edge of the trifles and creating a hollow middle so I could fill it later with layers of jello.
I found 2 Tupperware containers that were just the right size for what I needed. I put the Tupperware in the middle of each trifle dish and then put the gelatin flowers in alternating colors around them. I had just enough flowers to make 2 layers of flowers in one trifle and one layer of flowers in the other.

Next I made another recipe of the clear gelatin base and poured it into the cracks around the small flowers.
I am not going to lie… THIS IS WHERE IT ALMOST ALL CAME APART!!!
THE TUPPERWARE STARTED FLOATING AND ALL THE FLOWERS STARTED GOING UNDERNEATH THE TUPPERWARE!!! AHHHHH! NOOOO!!!!
Quickly, I had to get the Tupperware out, and get the small flowers out. However, we had one casualty. One red flower got chopped into pieces in the process and didn’t make it.
I wasn’t ready to give up yet. I cleaned out the trifle dish and tried again.
This time I put water in the Tupperware to keep it from floating. It worked. I put the small flowers around the Tupperware and poured the clear gelatin around it. I used a small tool to get the bubbles out the of cracks. Then I put the trifles in the refrigerator to set up for a couple hours.
When it came time to get the Tupperware out. I carefully poured the water out into the sink. Then I poured boiling water into the Tupperware to warm the surrounding gelatin and get the Tupperware to release easily. After just a few seconds, the Tupperware was able to come right out.


Finally after all that work, it was time to start the first layer of jello.

I like to make my layers with jello, evaporated milk, water, and ice. It’s a really easy recipe.
First off, I use the larger boxes of Jello solely due to price. I buy the larger boxes of when they are on sale and always have a stock in my pantry. You can use the smaller boxes if you would like. I just get out my kitchen scale and measure out 3 oz. so I know I’m using half the box.

Layered Jello Recipe
Ingredients
- jello
- boiling water
- cold water
- ice
- evaporated milk
Instructions
Regular Jello Layers
- Pour 3 oz. Jello into a medium mixing bowl. Add 3/4 C. boiling water and stir until gelatin is dissolved and not grainy anymore. Add 1/3 C cold water and 1/4 C ice to mixing bowl. Stir until the mixture is chilled, but before it starts to set up. Remove any leftover ice cubes. Refrigerate for at least 1 hour or until gelatin seem to be set up.
Evaporated Milk Jello Layers
- Pour 3 oz. Jello into a medium mixing bowl. Add 3/4 C. boiling water and stir until gelatin is dissolved and not grainy anymore. Add 1/2 C evaporated milk and 1/4 C ice to mixing bowl. Stir until the mixture is chilled, but before it starts to set up. Remove any leftover ice cubes. Refrigerate for at least 45 minutes or until gelatin seem to be set up. (Seems to set up quicker than regular layers.)
Layered Jello Instructions
- Alternate between a regular Jello Layer and an Evaporated Milk Layer. In any color pattern of your choosing. Make sure that the layer is set up before pouring the new layer on top. If it isn't set up well, they layer will lift up and float. I like to pour the liquid jello onto a spoon right above the cold jello layer . This helps to disperse the liquid jello without disrupting the layers. I use this recipe and separate the layers into 2 dishes so that they layers are thinner. My 2 trifles will hold 6-7 large (6 oz.) boxes of Jello. That's 12-14 layers! To get the slanted effect of the jello pictured, I carefully tipped the trifle dish in the refrigerator, changing the angle with each layer.


Above are some pictures of this years trifles getting their layers. The picture on the right is as far as I got on December 23rd before heading to bed. If I didn’t have to throw out the clear gelatin in the morning, I could have had it all done on the 23rd, but instead I had to wake up early on the 24th to get the final layers done before the family party later that day.
Because I had the flowers around the outside, it only took 5 layers to fill up one trifle (the one with 2 rows of flowers). It took 7 layers to fill up the other trifle.

After the last layer set up, I took the larger poinsettia flowers and placed them on top of the trifles. I made 3 because I wanted to assure that 2 turned out good. (All 3 were great.) I took the extra one to the smaller Christmas Eve party at my in-law’s house.
After placing the large flowers on top of the trifles, I made one more recipe of the clear gelatin base. The I poured it around the edges with a little layer going over the top to make sure there was a nice flat top to the trifles.


I finished the last layer about 24 hours after I threw all the bad jello out.
Here’s some pictures of the final products.


The family Christmas Eve party had 59 people there this year. It’s full of family and cousins that I don’t get to see very often. Some who came in from across the country that I haven’t seen for years.
With all those people, these jello trifles were devoured in no time. Do I mind that it took me all day long and it was gone so fast? Nope these jello trifles are made out of love for the best party of the year.

How much Jello was that? I weighed each jello trifle and later subtracted the weight of the dish.
One jello weighed 7.3 lbs, the other weighed 7.8 lbs. In total, that’s 15.1 lbs of jello!
If you made it all the way to the end of this long post, what do you think of all this crazy jello making? I’d love to hear your thoughts and comments.
Thanksgiving Jello Turkeys

The best creative minds seek to reuse and create art form unexpected places.
This past November, as we were getting ready for a family dinner one Sunday, my mom was about to throw out the packages from the fun Turkey Butter Sculptures she had bought when I said, “WAIT! Don’t throw those out. Can I have them and make some jello turkeys out of them for Thanksgiving?”
Of course my mom didn’t mind, she was going to toss the packages. But one man’s junk is another man’s treasure and I knew that I had just scored 4 amazing turkey molds.

I used Keller’s Turkey Shaped Butter Sculpture packages to make the turkeys. My mom found them at the grocery store, but knowing that these are seasonal products, I found a few options on Amazon that you can try if you can’t find these exact packages. Also, I know Keller’s has Christmas Tree Shaped Butter Sculptures around Christmas time.

I washed the plastic molds in soapy water to get the leftover butter out and then dried them. What I like about the Butter Sculpture packaging is that you can snap the packaging together, turn it upside down and open the flap on the bottom. That way you can pour the jello straight into the molds.

It only takes four simple ingredients to make the jello turkeys. It’s super easy! But you will want to follow a few tips to make everything go easier.
Expert Jello Tips

- First off, don’t use the regular Jello recipe on the box! Use the jello jiggle recipe or the recipe from this post.
- Second, don’t pour hot jello into the molds. Let it cool down for a few minutes or you may melt the plastic molds. You need to let it start to set up just a little.
- Third, Put the butter sculptures on a plate or tray before pouring in the jello. A little bit of jello may get out through the cracks and make. a mess.
- Fourth, make sure to give the jello enough time to set up in the refrigerator.
- Fifth, heat some water on the stove and pour into a large bowl. After the water has cooled down for a few minutes, dip the turkey molds into the water for about 4 seconds to help them release from the molds.
- DO NOT place the molds into boiling hot water! I did this with the first turkey mold and quickly melted the mold and the jello turkey in just a couple seconds. (See how the orange turkey on the back row in the first picture leans to the side.) Ooops!
I so enjoyed bringing these turkeys to Thanksgiving dinner. All the kids loved them and either ate a whole or a half turkey. It’s fun to hear the kids talk about eating the turkey head etc.
I’d love to see your jello turkey creations or other jello mold creations. Please comment and leave a link below.


Jello Jiggler Turkeys
Equipment
- turkey molds or other desired shapes
Ingredients
- 1 pkg Jello/ flavored Gelatin (6 oz.)
- 1 cup whipping cream
- 1 cup boiling water
- 1/2 C ice
Instructions
- Pour gelatin into a medium mixing bowl. Add boiling water and stir until gelatin is dissolved and not grainy anymore.
- Add whipping cream and ice to mixing bowl. Stir until the mixture is chilled, but before it starts to set up. Remove any leftover ice cubes.
- Let the gelatin sit in the refriderator for 3 minutes.
- Pour chilled gelatin into the turkey molds.
- Refrigerate for at least 3 hours or until gelatin seem to be set up.
- When you are ready to get the gelatin out of the molds, boil a few cups of water. Pour into a clean mixing bowl. Let the boiling water cool down just a little bit.
- Gently dip the plastic turkey mold into the hot water for just a couple seconds. This will help the gelatin release from the edge and not stick. I only needed to dip the mold into the hot water for about 4 seconds. Time needed to dip the mold in hot water depends on the thickness of the mold and if it is made of plastic, glass, or metal.
- Carefully remove the gelatin from the mold and place on serving dish.
- Enjoy.

Happy Thanksgiving Everyone!
Thanksgiving Trifle… with meat?
Custard… Good.
Jam… Good.
Meat… Good.
Just kidding. But when I told my family that I wanted to bring a trifle to our preThanksgiving dinner last Sunday and my brother asked if I was going to add meat to it, all of the Friends Thanksgiving jokes started flying.
So obviously I had to make a little trifle especially for my brother with meat in it. Well, that’s what he thought due to what looked like a layer of ground beef in his mini trifle.

At first he wasn’t sure whether or not it was meat, but he came to the conclusion that it was ground beef due to one piece that wasn’t cooked fully and was still a little pink. (HAHA, it was just a little jello on it.)
Everyone dished up their Thanksgiving plates and sat down at the table to feast. Part way through dinner my brother finally got the nerve up to give his special trifle a bite. Digging in to make sure he had all of the layers he took his first bite with a grimace.
“That’s not meat!” He said. “Wait… don’t tell me. I know that flavor.” He took another bite. “It’s… Cracklin’ Oat Bran! Mmm! It’s even better! So good.”
Do you think I could actually put meat in a trifle. No. I can’t that’s just disgusting. So I crumbled pieces of Cracklin’ Oat Bran cereal up to small pieces that could pass for ground beef. It was a perfect substitute. And happens to be one of my brother’s favorite cereals. He loved his mini trifle even more than before and would not share.
I based this trifle off of my first favorite jello creation. I used to love looking through this book and creating fun jellos. But the one on the cover was by far my favorite. You can find a copy of this great vintage book here.

The trifle I made this year for Thanksgiving, was a little bit different than the book from the recipe. I used Scottish Shortbread instead of pound cake. I love the Scottish Shortbread because it didn’t get soggy and gross.
Also, it takes a little bit of finesse to get the fruit to stick to the side of the trifle and not float up.
HERE’S THE TRICK: LET THE JELLO SET UP A LITTLE IN THE FRIDGE FOR ABOUT 5 – 10 MINUTES BEFORE PUTING THE FRUIT IN. CAREFULLY USE A FORK OR SPOON TO PUSH YOUR FRUIT TO THE SIDE OF THE TRIFLE IN THE PLACE YOU WANT IT. IF THE FRUIT JUST WANTS TO FLOAT, TAKE IT OUT, WAIT A COUPLE MORE MINUTES AND TRY AGAIN.
The jello has to be a little set up for the fruit to stick or else it will just float.

Here is the easy recipe for this fabulous trifle. You can make it with or without the “meat”. Make it with what you have on hand. Switch out the gelatin flavors, the fruit, the shortbread. I’d love to see your trifles. Tag us #thejellohome or @thejellohome.

Strawberry Banana Pudding Trifle
Ingredients
- 2 packages (8 serving) Strawberry or Raspberry Gelatin
- 3 C boiling water
- 2 C cold water
- ice cubes
- 1 lb sliced fresh strawberries
- 2-3 sliced bananas
- 1 C Cracklin' Oat Bran (Crumbled) optional
- 2 packages Scottish Short Bread optional
- 1 package (8 serving) Instant Vanilla Pudding
- 3 C cold milk
- 8 oz. thawed Cool Whip
Instructions
- Dissolve one package of gelatin in 1 1/2 Cups of boiling water. Combine 1 Cup cold water and ice cubes to make about 1 1/4 Cups. Add to gelatin and hot water. Stir until the bowl feels cold. Remove any unmelted icecubes. 2. Pour into trifle dish. Refrigerate for about 10 minutes while you cut up the strawberries.3. Carefully add the strawberries to the gelatin layer using a fork and press to the side of the trifle dish. Note, if the fruit starts to float, remove the fruit, refrigerate for a few more minutes and try again. The fruit will not stick to the side of the dish unless the gelatin is slightly set up. 4. Refrigerate for at least 1 hour or until set. 5. Repeat first step: Dissolve the other package of gelatin in 1 1/2 Cups boiling water. Combine 1 Cup cold water and ice cubes to make about 1 1/4 Cups. Add to gelatin and hot water. Stir until the bowl feels cold. Remove any unmelted icecubes. 6. Do not pour the gelatin into the trifle dish yet. Refrigerate for about 10 minutes while you cut up the bananas.7. Now pour the chilled gelatin into the trifle dish. Note, adding a hot layer of gelatin to a cold layer of gelatin can ruin both layers. You want the gelatin to be chilled but not very set up. 8. Carefully add the bananas to last gelatin layer and press to the side of the trifle dish as in step 3.9. Refrigerate for at least 1 more hour or until set.10. Optional: Add layer of crumbled Cracklin' Oat Bran. Mmm… good. 11. In a separate bowl, combine Vanilla Pudding and milk. Mix with an electric mixer at a low speed until well blended. Set aside.12. Cut Scottish Short Bread in half. Line up around the edge of the trifle dish. 13. Now fold in thawed Cool Whip or whipped topping to the pudding bowl. Spoon into the trifle bowl. 14. Refrigerate for another hour.15. When ready to serve, garnish with additional whipped cream or whipped topping and sliced strawberries and bananas.
#friendsgiving #trifle #meattrifle #friends #rachelstrifletasteslikefeet#jellotrifle #thanksgiving#thanksgivingdinner #jello #minitrife#foodimposters
#cracklinoatbran#scottishshortbread #yummy#getinmytummy #beautifulfood#jelloart #beautifuljello
#friendsfan#friendsthanksgivingepisodes#foodtrick #hethoughtitwasmeat#coolwhip #rediwhip#strawberriesandbananas
First Jello Flowers – Mistakes and Success
The first night I got the gelatin flower tips, I was so excited. However, I didn’t have any clear gelatin in the pantry so I decided to try to make flowers in some Jello I already had on hand. It did NOT work. The colors of the gelatin I had were too dark and you can’t even tell that I tried to put a flower in the jello. Don’t try it. It’s not going to work.
(Also, I love to use my Great-Grandma’s Corelle vintage dishes. They are my go to dishes for lunch and when I just need a plate. Love them.)

So the next day I went to the grocery store and bought a package of Knox clear gelatin and some flavoring. **Note – You have to flavor clear gelatin. I tried to use a clear gelatin once years ago and didn’t flavor it. It was terrible. Don’t make the same mistake. Check out this post on my clear gelatin recipe.
That night, I created my first successful gelatin flower. It turned out amazing and it really wasn’t that hard. It’s pretty easy for an impressive effect.


Here are some links to some products that. can help you get started with your first gelatin flower. Make sure you get clear flavors for the clear part of the gelatin.

I’d love to see your first jello flowers. Please leave a comment and link below.
Brains Anyone?

I wanted to share with you my Halloween Jello from this year’s family party. Our Brain in a jar Jello. It was creepy, awesome, and the talk of the party. It was also very fun to serve. I’d ask each guest, “Brains?” Then dig in with the scooper to dish out the brains. It would make a slurping slimy sound that was perfect.


I started to write the recipe for this dish but decided it was a little too advanced for this blog’s first recipe. The blue gelatin isn’t just a box of blueberry Jello. That would be too dark and you wouldn’t be able to see the brain. It’s clear gelatin with one drop of turquoise food coloring.
The Brain is made from Strawberry and Raspberry Jello with some gelatin and whipping cream.
I’m going to start with a few of my basic recipes and work up to this level. I’ll definitely have this recipe up by next Halloween. If you would like the recipe and think you are up for a challenge message me and I can send it to. you.
In the meantime, here are a few supplies you might need to get.
- a brain jello mold. I bought mine at the local Dollar Store. But if you can’t find one there, you can find one one Amazon here.
- a trifle bowl
- a syringe
- a couple boxes of Jello in the color and flavor you want the brain
- clear gelatin. You can use Knox gelatin. I use SuperClear gelatin from Amazon, here.
- citric acid, to flavor the clear gelatin
- flavors to flavor the clear gelatin. I use clear flavors like you would use to flavor suckers, like these.

(I use Canva to make these great pictures with titles. Try it out today.)