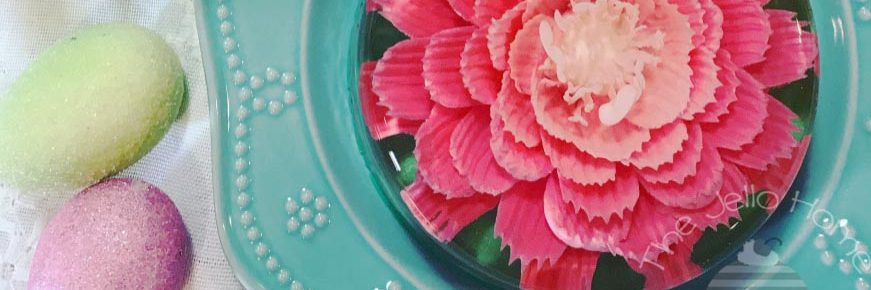
You will want this recipe for eye-catching, beautiful flowers that stand out from within the clear gelatin base.

When I first started making gelatin flowers, I started with ingredients that I already had in my pantry. However, the colors were translucent and not very vibrant. A few of the must have ingredients that I use to create beautiful colors for the gelatin base are whipping cream and white food coloring.
At first I used milk instead of cream, however, once seeing the difference in the flowers and especially tasting the difference, I use whipping cream instead. It makes so much of a difference.
Next, I started adding white food coloring. It just made the colors pop and so beautiful. Here are a couple links to some on Amazon. The Americolor is a better deal for 6 oz. But the Wilton 2 oz. bottle is enough to get you started.
You will also need some syringes and needles before you get started. I have seen posts where people use cut straws to do this, but it is so much easier with the right tools. There are tons on Amazon to choose from, but here are some of my favorites. Also, if you want a starter kit will all of the things you need to get going, Check out the Gelatin Art Starter Kit.

Colored Base for Gelatin Flowers
Equipment
- Syringes
- Needles or Flower Tips
- Pan on the stove with a warm water bath to keep gelatin from setting up
Ingredients
- 1 Tbsp gelatin powder
- 3 Tbsp cold water
- 1 Cup heavy whipping cream
- 1/2 Cup sugar
- 1 drop food flavoring
- 3/4 Tbsp white food coloring
Instructions
- First, make the clear gelatin recipe and make sure it is set before you begin creating the colored gelatin for the flowers.
- Mix gelatin with cold water and let stand for 5 minutes.
- Heat sugar with 1/2 Cup of cream in a sauce pan, stirring constantly. Remove from heat when vapor appears above the surface, do not let it boil.
- Add gelatin and stir until completely dissolved, then add the remaining 1/2 Cup of cream.
- Stir in one drop of food flavoring.
- Mix in the white food coloring using an emulsion blender, or a regular blender if you don't have an emulsion blender.
- Put back onto the stove on a very low heat to keep the gelatin warm. Stir occasionally.
- Get the clear gelatin out of the refridgerator. Cut a small circular hole in the middle of the top of the set clear gelatin.
- Pour some of the colored gelatin base into a small bowl or glass. Color it with food coloring.
- Using a syringe and a needle, inject the colored gelatin into the clear gelatin base. Play around with different techniques and designs and colors. It is easier than it looks and fun to create.
- Keep the colored gelatin woarm in the water bath while you are creating with other colors. You don't want the gelatin too hot or too cold. Also having boiling water in a couple other cups in the water bath is good to clean the needles and syringes when needed so they don't get clogged.
- Have fun!

Creating a mess is just part of the fun! Here’s a behind the scenes picture of the mess I create while making a flower.

Can you tell which flowers were made without white food coloring and used milk instead of heavy whipping cream? I can. The first two flowers are so much more translucent than the last two flowers. Trust me. There’s is a huge difference in real life.


4 thoughts on “Colored Base for Gelatin Flowers”
Comments are closed.
This is AMAZING! I’ve never seen Jello flowers before. I was looking to do an old Jello dessert that my Gramma used to make with green on the bottom, red on the top, and marshmallow cream in between, but this is so not even on the same playing field!
I’d love to see your Gramma’s jello dessert. Grandma recipes were always the best…. mostly.
WOW, these are so beautiful and creative- I don’t think I could eat them, they are just gorgeous! I didn’t even realize this was something that could be done, lol, but I really enjoyed the video watching you do it and look forward to watching some of your other videos too! Thanks!
Thanks Robin! Everyone always tells me that they are too beautiful to eat. But that’s why I make them. To eat and enjoy.